The Soundproofing Store Studio Team
Here at the Soundproofing Store, we are very experienced in the design and supply of soundproofing systems for Recording Studios and Practice Rooms from home studios to professional.
Soundproofing a room for high levels of amplified music can be very daunting, so don't worry, you're not alone. Our dedicated studio team can help in the full design of your studio soundproofing and acoustic treatment, and can offer technical advice on all aspects of your studio soundproofing / acoustics. Our team are highly trained and very experienced in this specialised area.
Our system is very high performing whilst keeping space loss to a minimum, which is ideal for smaller spaces like home studios, garage conversions etc, where building multiple layers of concrete walls are not an option.
What Is The Construction Of The Studio Building ?
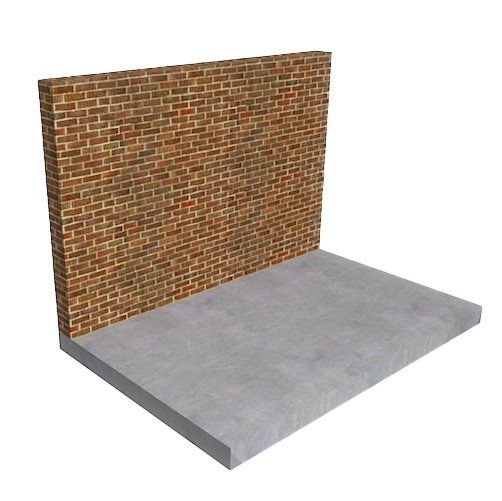
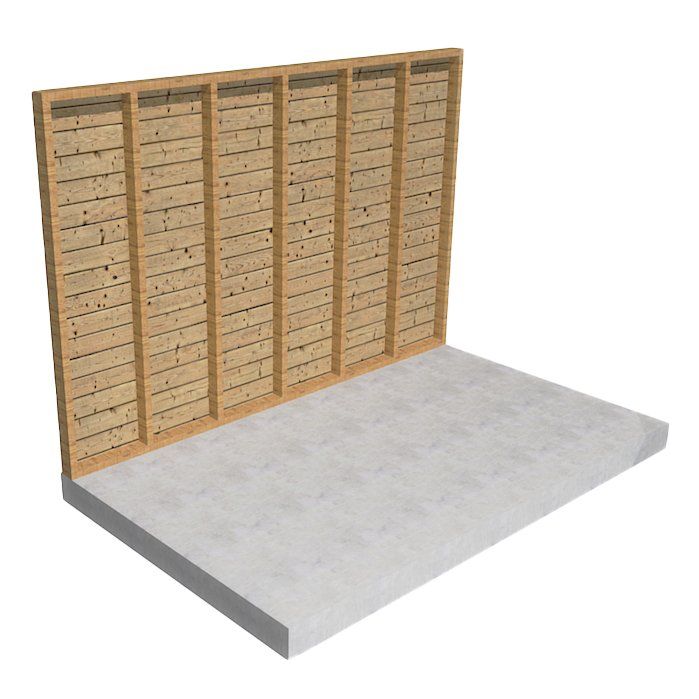
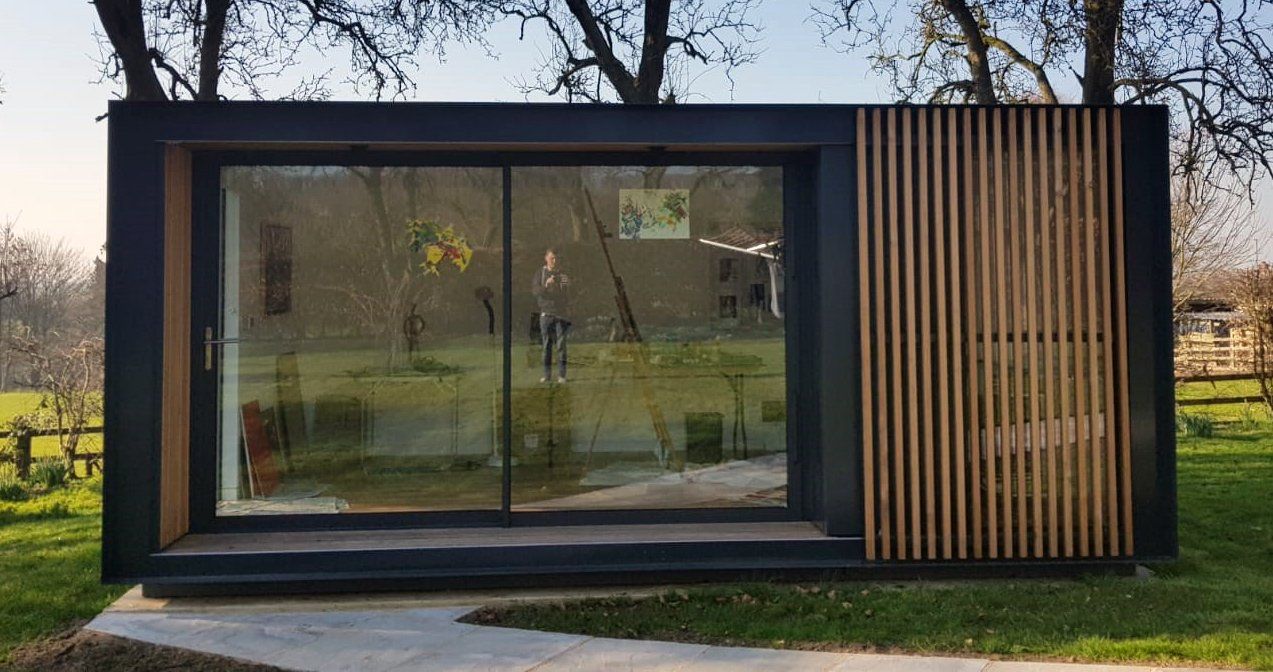
The first thing we need to know is what the intended space is constructed from. Is your space a solid (brick/block) structure such as a garage, outbuilding or room within your home? Or do you have a timber based structure such as a garden room, shed or barn?
Book a FREE 45 mins Soundproofing Studio Consultation
Attend your phone appointment at a time to suit you with one of our Studio experts
Past Client Installation and Testimonial Videos
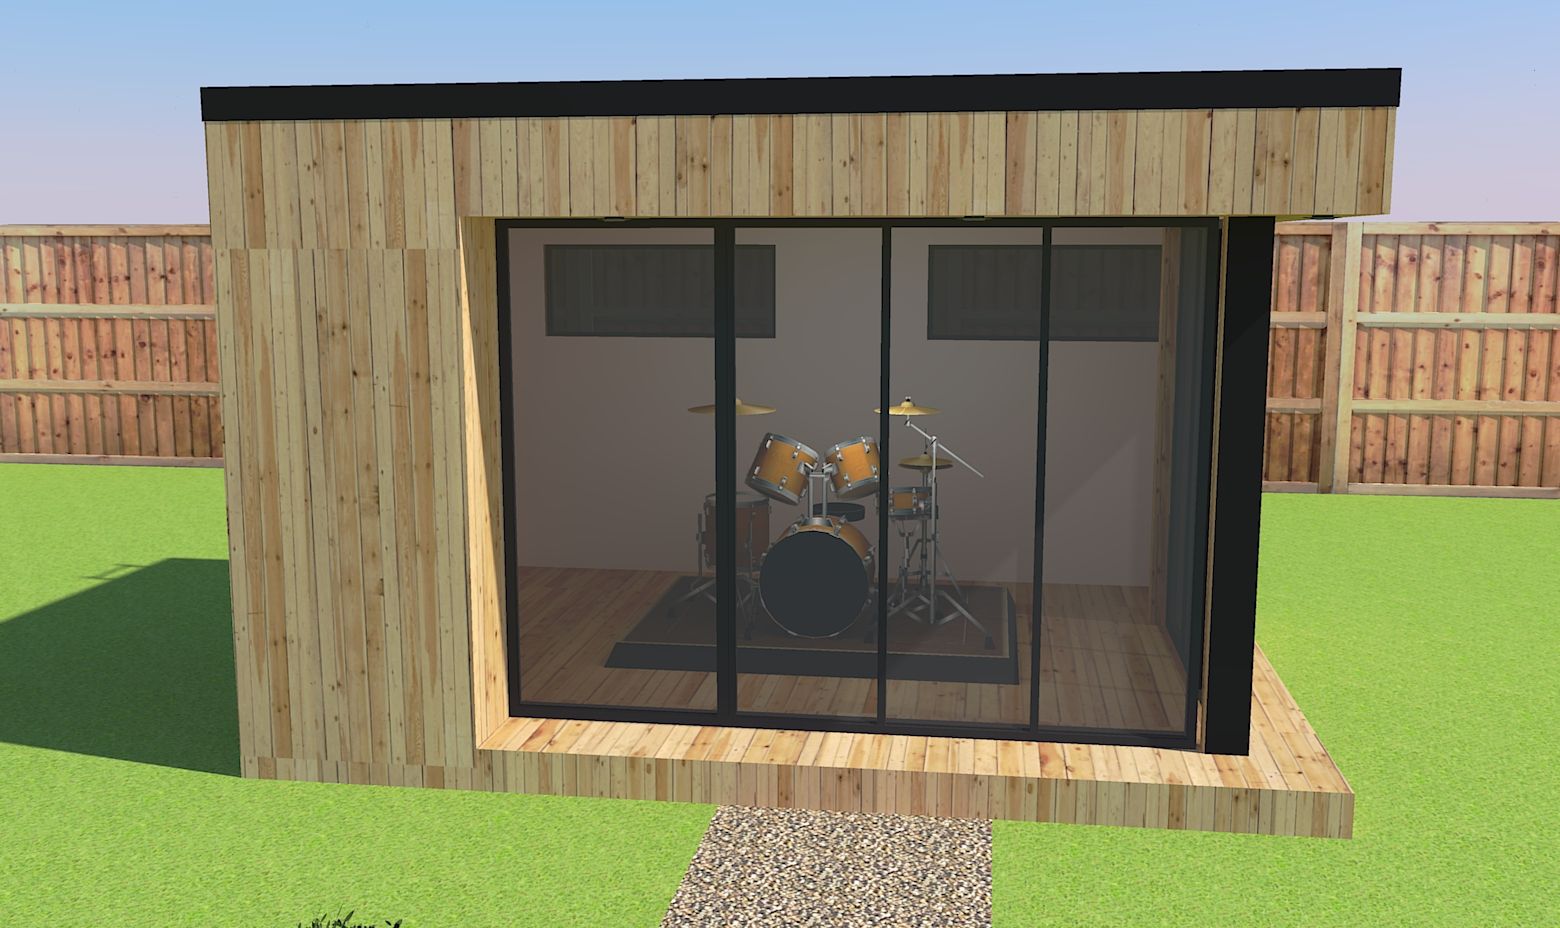
Full Garden Studio Build
Case study from one of our customers who built a fully soundproofed, new garden room for band rehearsals based on our specification.
DIY Garage Conversion by Benjamin Kinsey-Jones
Ben documented his DIY garage studio conversion. System designed and specified by our dedicated studio team. Check out Ben's band 'Friendly Tigers'.
Garage Conversion Results by Levi Clay
Youtuber Levi Clay soundproofed his garage using our system. He filmed these results before finishing the installation. But the results were already fantastic!
How To Soundproof A Music Studio / Practice Room (Solid Building)
Firstly, the fact that you have a solid structure to begin with is a great start. One of the most important rules of soundproofing is that airborne sound is blocked by mass. So the heavier and more dense a material is, the more difficult it is for sound to pass through it. Your structure will already be adding some good mass to get us started, once we've added a lot more to it, you can get really great results.
What Kind Of Results Can You Expect?
Results vary in every situation because every wall is different, every structure is different and every sound is different. But as a rough idea, using our recommended specification and soundproofing systems internally, a single brick wall studio can expect sound reductions of around 65dB, double brick or high density block buildings will be getting around 70dB reduction, a double thickness block wall could be getting up to the 85 - 90dB reduction range.
What does this mean?
A room reducing 65dB means any sound inside up to around 85 - 90dB should be blocked out except for potentially a small amount of the low bass / sub bass rumble. Anything over that will be heard but at a low volume.
A room reducing 70 - 80dB will block out sounds up to around 100dB which covers most amplified instruments and drums played at studio volume level. Anything over that will again be reduced to an extremely quiet, very muffled level. Once 5 - 10 metres away you should have silence.
A room reducing up to 90dB should be blocking out everything up to around 120dB which should easily cover any live music application.
The Key Steps to Soundproofing a Music Studio
- Build A "Room Within A Room" - To contain the airborne sound and sound energy / vibration internally and stop it getting to the structure of the building.
- Add Mass - Airborne sound is blocked by mass. The heavier and more dense the surfaces of your inner room are, the more sound it will block.
- Add Resilience - The rooms ability to absorb sound energy and vibration. The surfaces need to be able to flex rather than being rigid.
- Make The Room Air Tight - Any gaps for air to leak through, sound will leak through.
- Upgrade Windows And Doors - These are the biggest weak points of the room with far less mass than the surfaces. Upgrade and Double Up!
When a high volume of sound is projected, it creates an Airborne sound wave, but also a strong vibration energy. The airborne sound will spread out 360 degrees so lining all surfaces with heavy, dense materials will make it harder for the soundwave to escape.
Just as importantly, you need to absorb the energy and vibration of the sound. If the vibration gets into the structure of the building it will spread very easily. Therefore, we need to build new soundproof, resilient walls in front of every existing wall, a suspended ceiling below the existing ceiling, and a floating floor above the subfloor. This creates a soundproof box internally, that can contain the sound and vibration and stop it getting into the structure. These surfaces need to be able to flex to absorb the sound in the same way a cars' suspension springs help it absorb the impact of potholes.
Soundproofing the Walls and Ceilings of a Music Studio
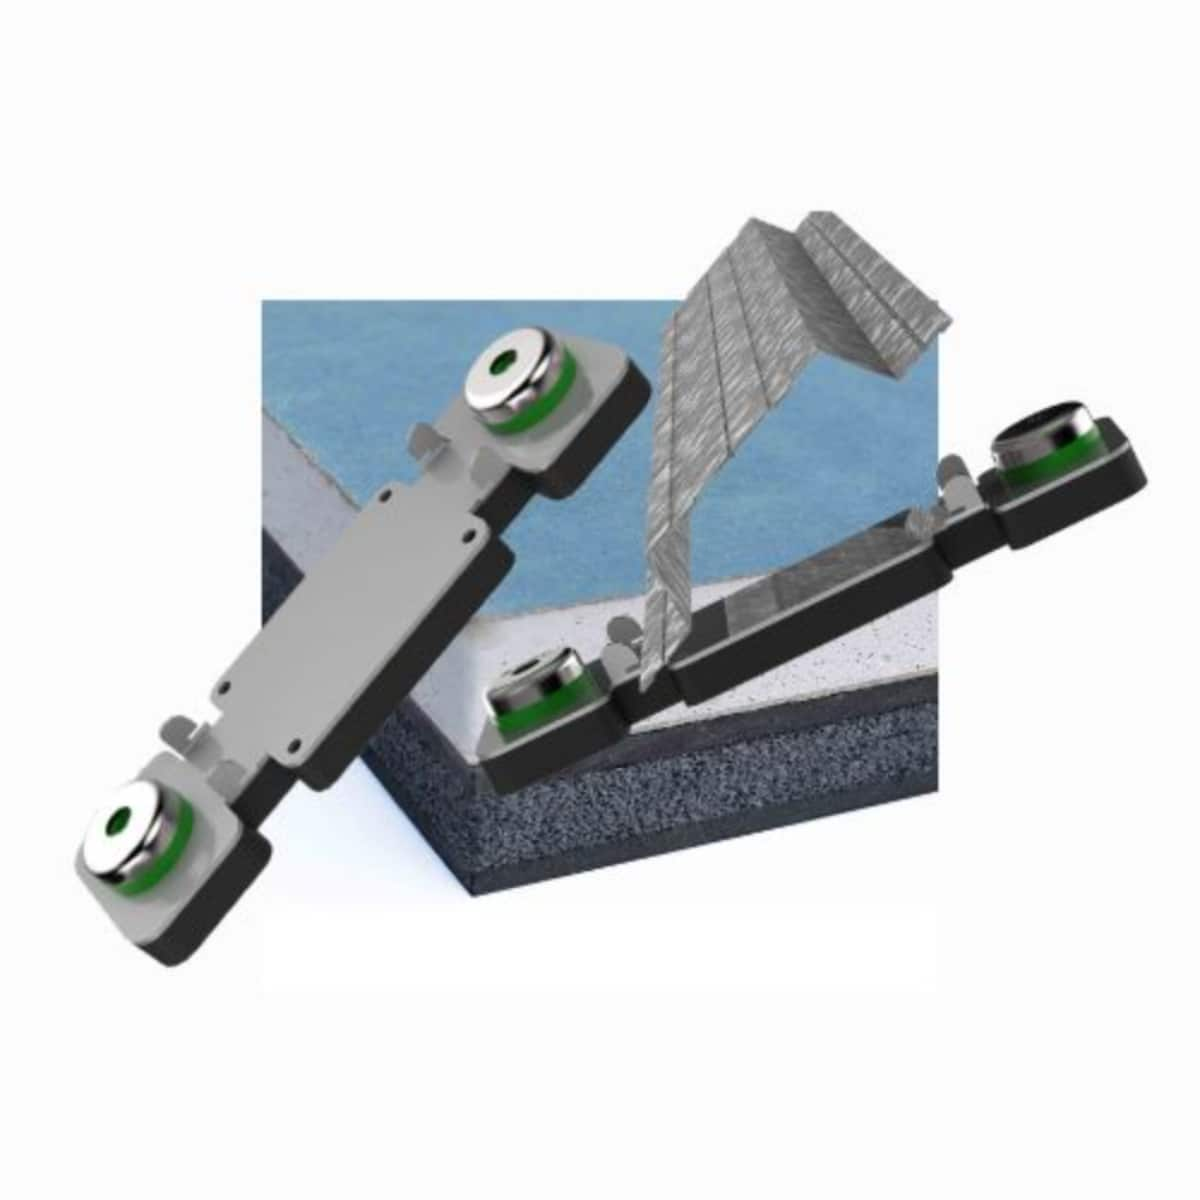
To create the internal walls and ceiling, we use our ReductoClip system. This system is designed to add a lot of extra mass to the walls and ceiling but that mass is fixed in a resilient way, allowing it to absorb huge amounts of vibration, including the strong vibration of lower bass frequencies.
Unlike traditional resilient bar soundproofing systems, our ReductoClip system offers the slimmest independent wall solution and the highest level of soundproofing
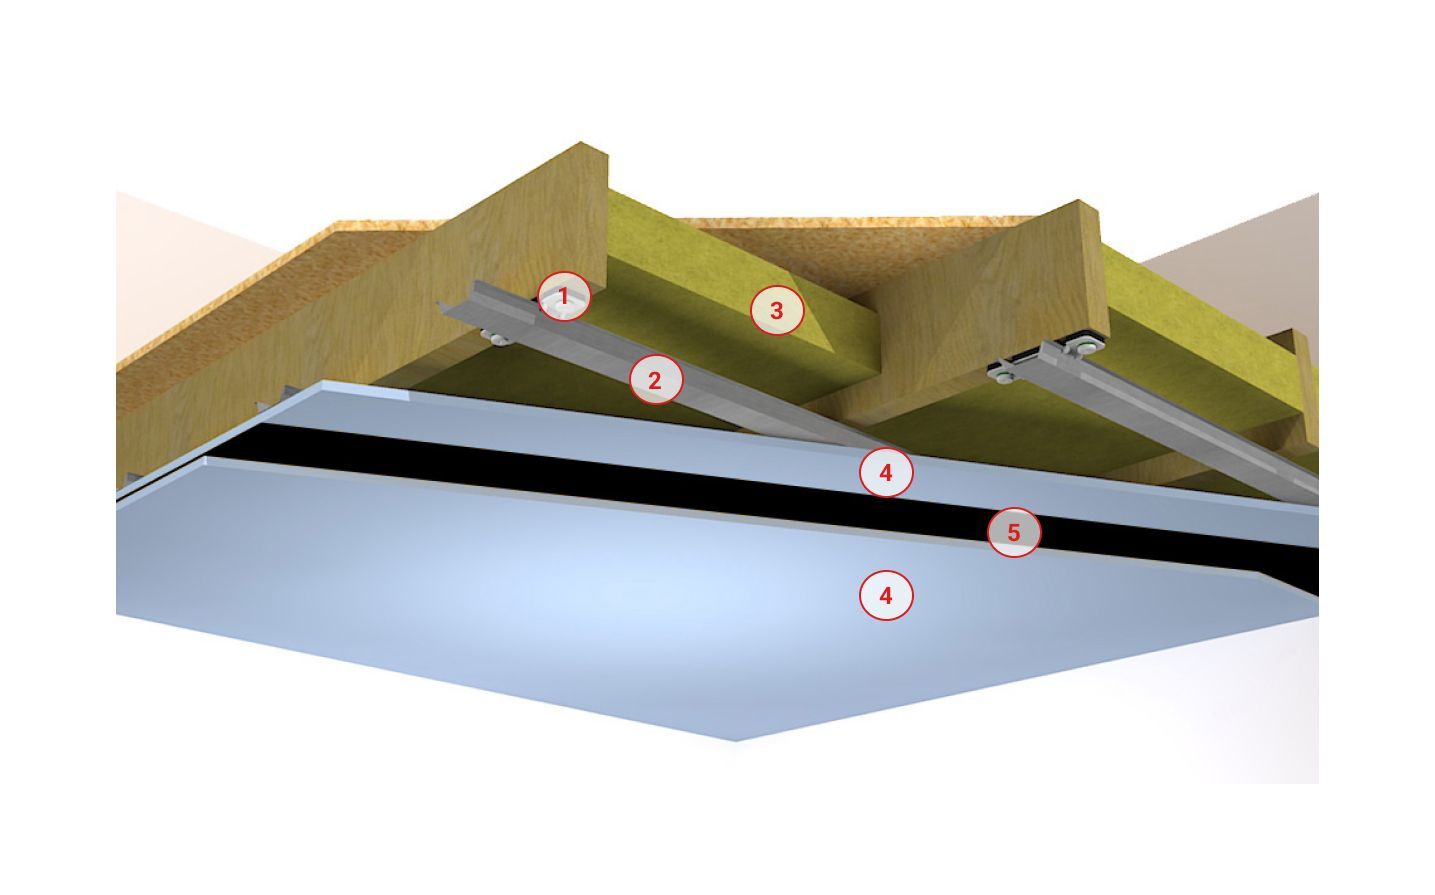
1. ReductoClips - decouple the mass layers from the timber joists and act like a shock absorbing suspension system to dampen high levels of sound energy and vibration
2. ReductoClip Furring Channels - extra wide to make fixing acoustic plasterboards quicker and easier
3. Acoustic Mineral Wool - dampens sound within the cavity to stop sound amplifying
4. Acoustic Plasterboard - (2 layers) to increase the mass of the ceiling. More mass and density than standard plasterboard but with the same finishing and decorating techniques
5. FlexiSound 5 - viscoelastic membrane to add further mass to the ceiling. A different type of mass to reduce different sound frequencies to the other layers. FlexiSound also helps to dampen sound energy and vibration
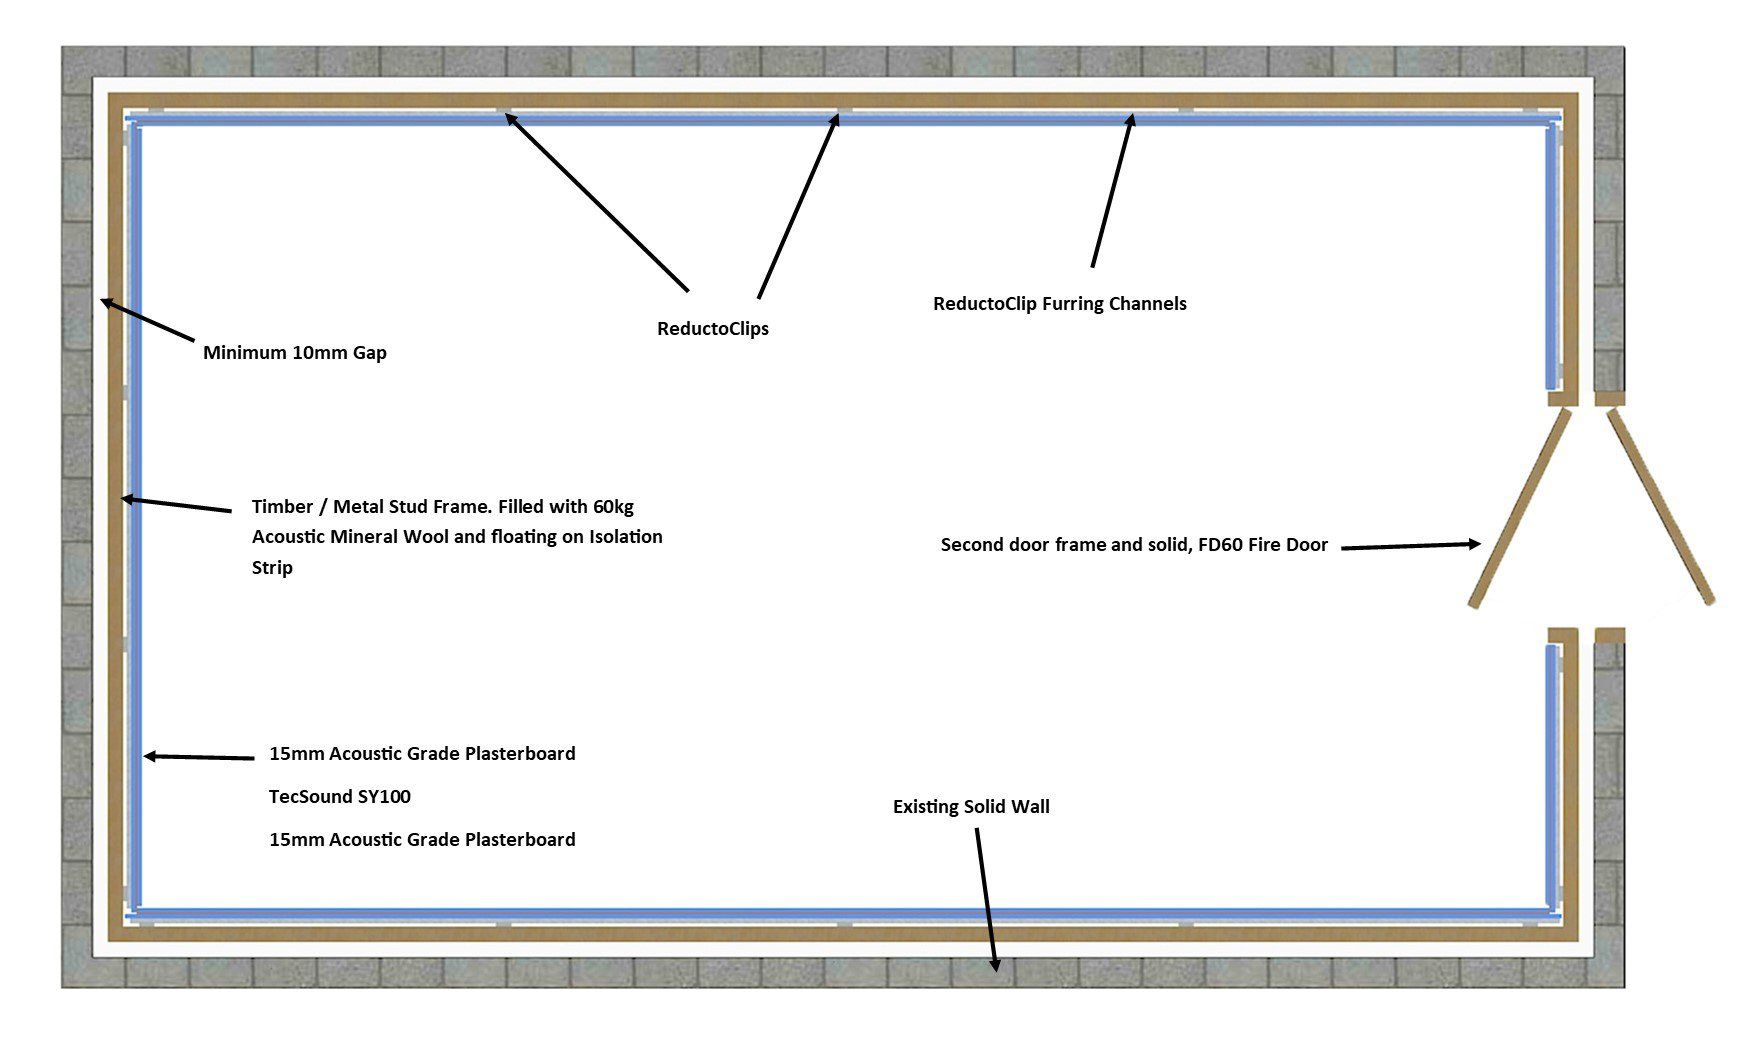
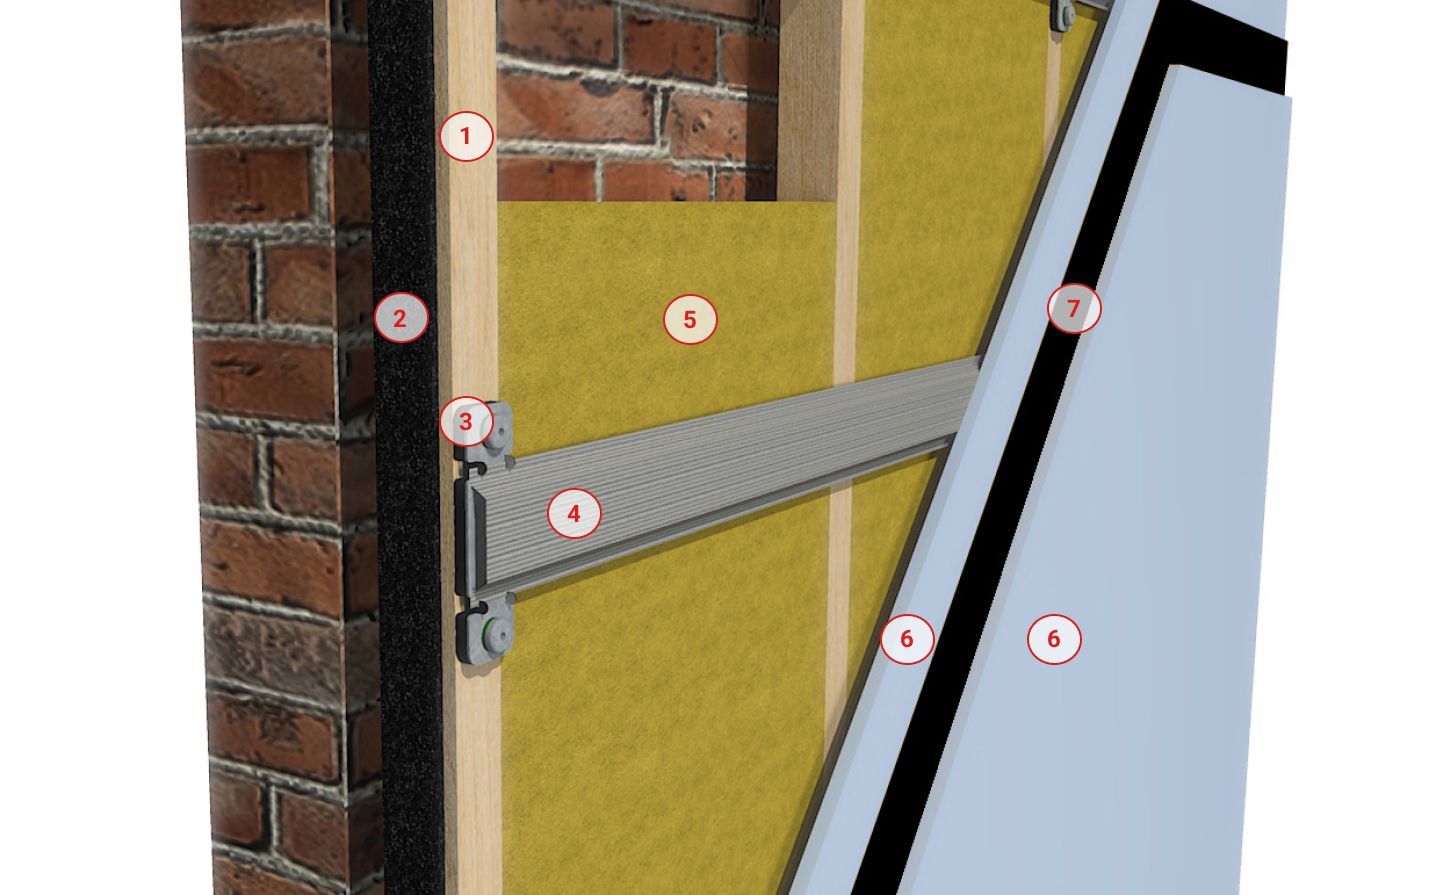
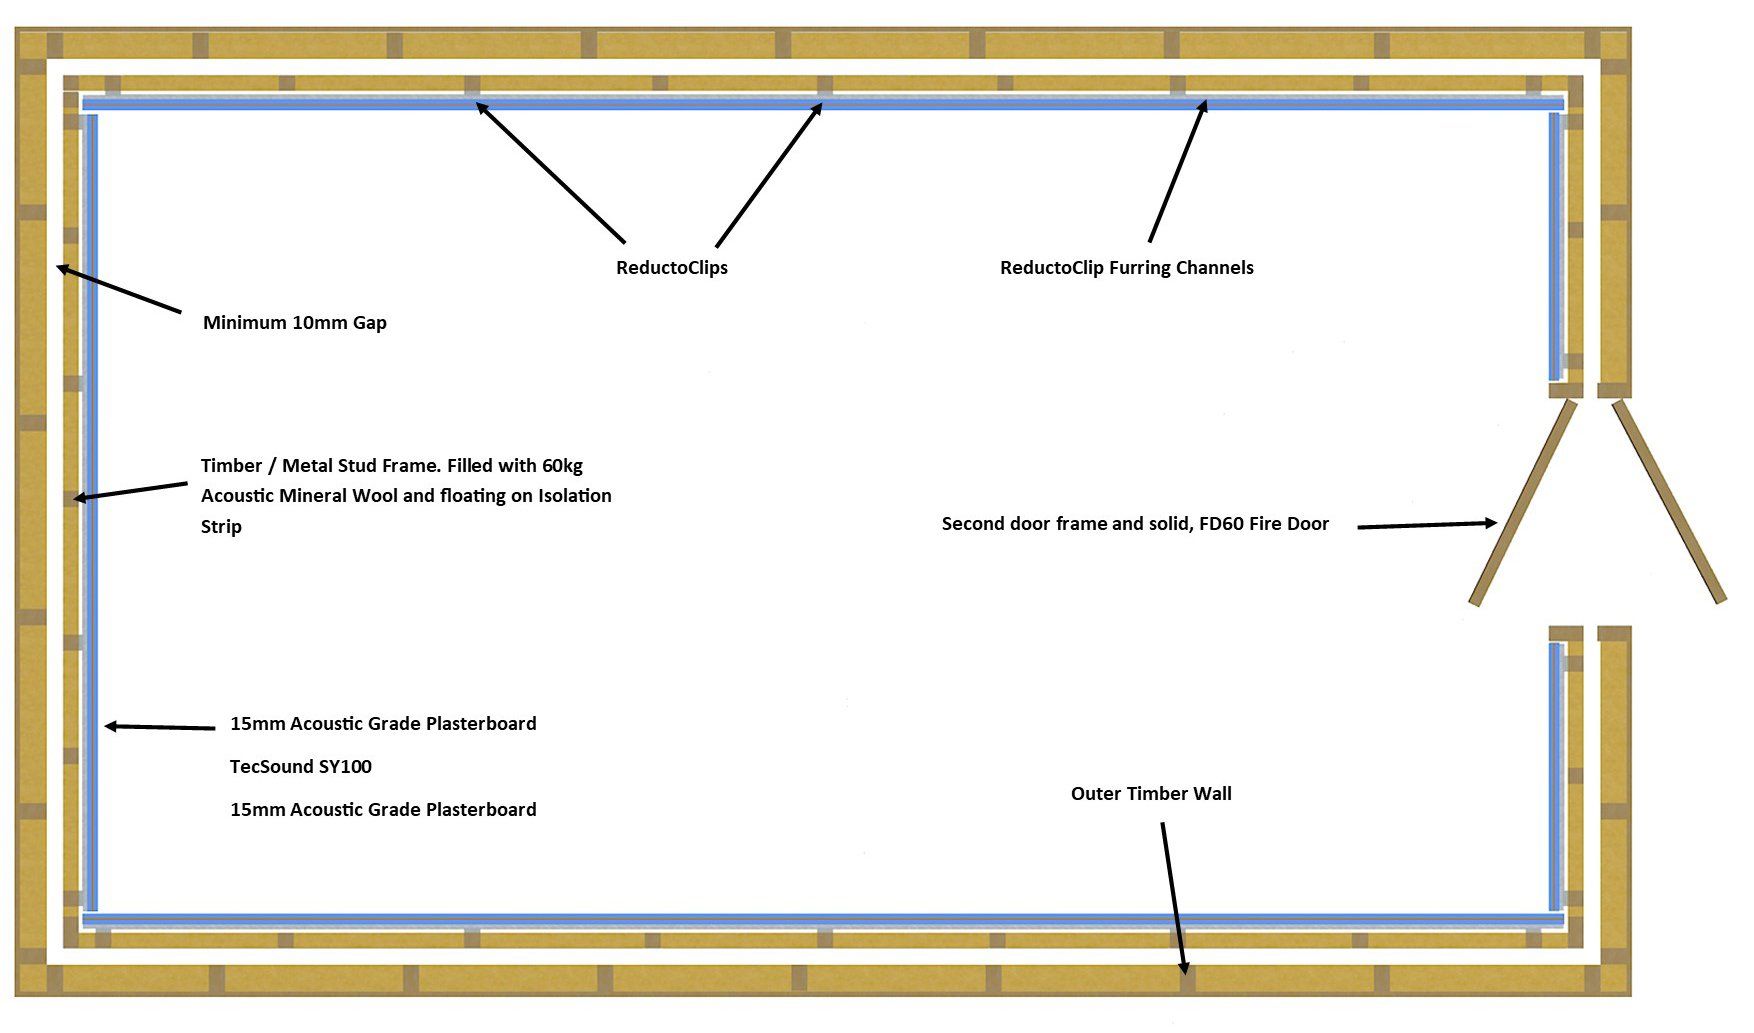
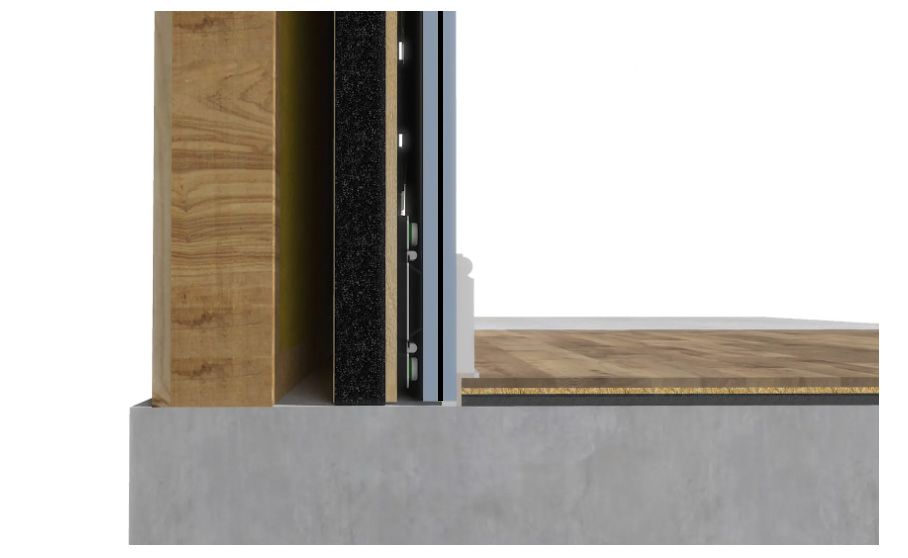
1. Independent Stud Frame - 10mm air gap isolates the soundproofing from the offending wall for best possible sound reduction performance
2. Isolation Strip - isolates from surrounding surfaces to reduce flanking vibration
3. ReductoClips - decouple the mass layers from the frame and acts like a shock absorbing suspension system to dampen high levels of sound energy and vibration
4. ReductoClip Furring Channels - extra wide to make fixing acoustic plasterboards quicker and easier
5. Acoustic Mineral Wool - dampens sound within the frame cavity to stop sound amplifying
6. Acoustic Plasterboard - (2 layers) to increase the mass of the wall. More mass and density than standard plasterboard but with the same finishing and decorating techniques
7. FlexiSound 5 - viscoelastic membrane to add further mass to the wall. A different type of mass to reduce different sound frequencies to the other layers. FlexiSound also helps to dampen sound energy and vibration
Floor Soundproofing
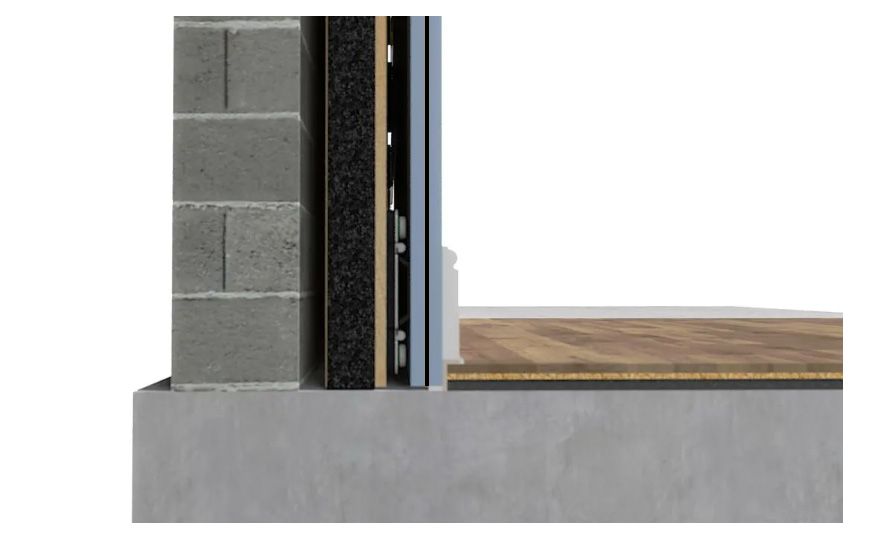
On a concrete floor you already have a great deal of mass already there. All we really need to do is absorb the vibration and energy of the sound. To minimize height build up, we have some very thin solutions to create a "floating" floor, separating your floor finish
(carpet / laminate etc) from the concrete and absorbing the vibration in between.
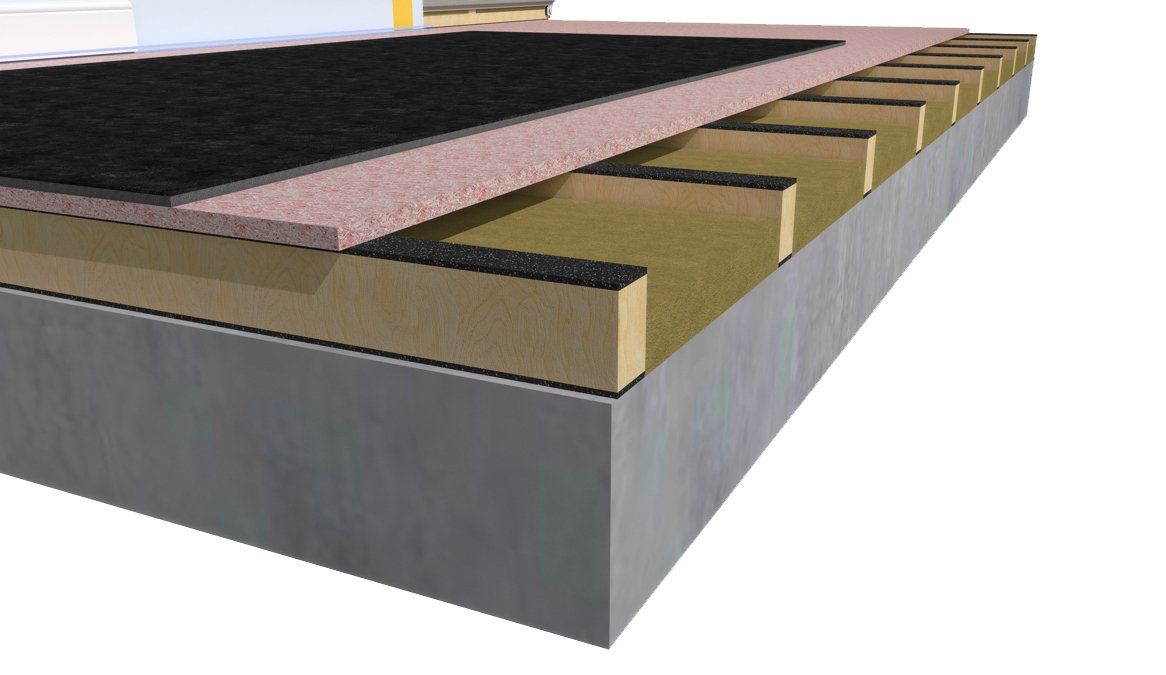
If you have plenty of height to play with, you can further upgrade the floor by creating a secondary floor using isolated timber battens, insulation and then a combination of high mass floor boards and a resilient layer.
ImpactoMat 5mm or SoundMat 2 Plus direct to concrete with floor finish directly on top
Floating floor using timber battens isolated with Isolation Strip above and below, 60kg mineral wool between battens, SoundScreed 25mm direct to battens and SoundMat 2 Plus above.
If your studio is not on the ground floor or is a timber joist construction instead of concrete, you will have to go a lot further. Get in touch for advice.
Soundproofing Doors and Windows
Windows and Glass Doors
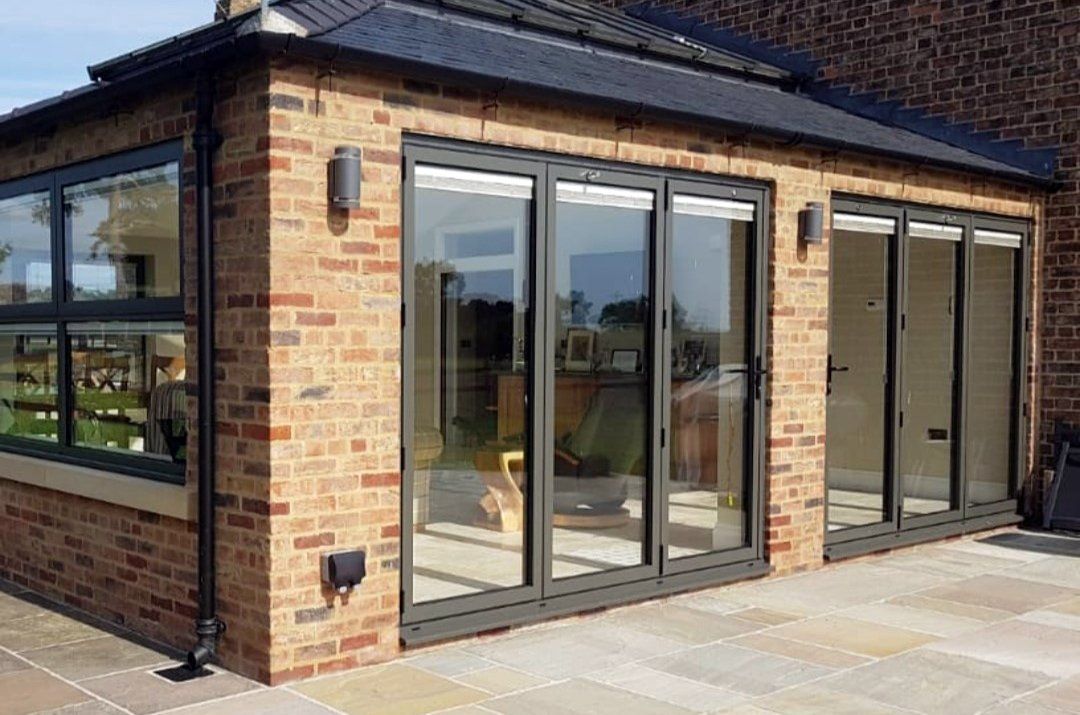
Windows and doors will always be the weak link as they have far less mass than the walls. In a perfect world we would have just one single width door and no windows at all, to get best results. However, we appreciate that a lot of people like to have some natural light in the room.
Our advice is either remove windows and large doors and brick them up, or double them up. Because you are building a new soundproof wall on the inside you can have one window on the external wall and another window (secondary glazing) on the inside. This will still be weaker than the rest of the wall, but it will be a minimal weak point now and you can keep your natural light.
Single Entrance Doors
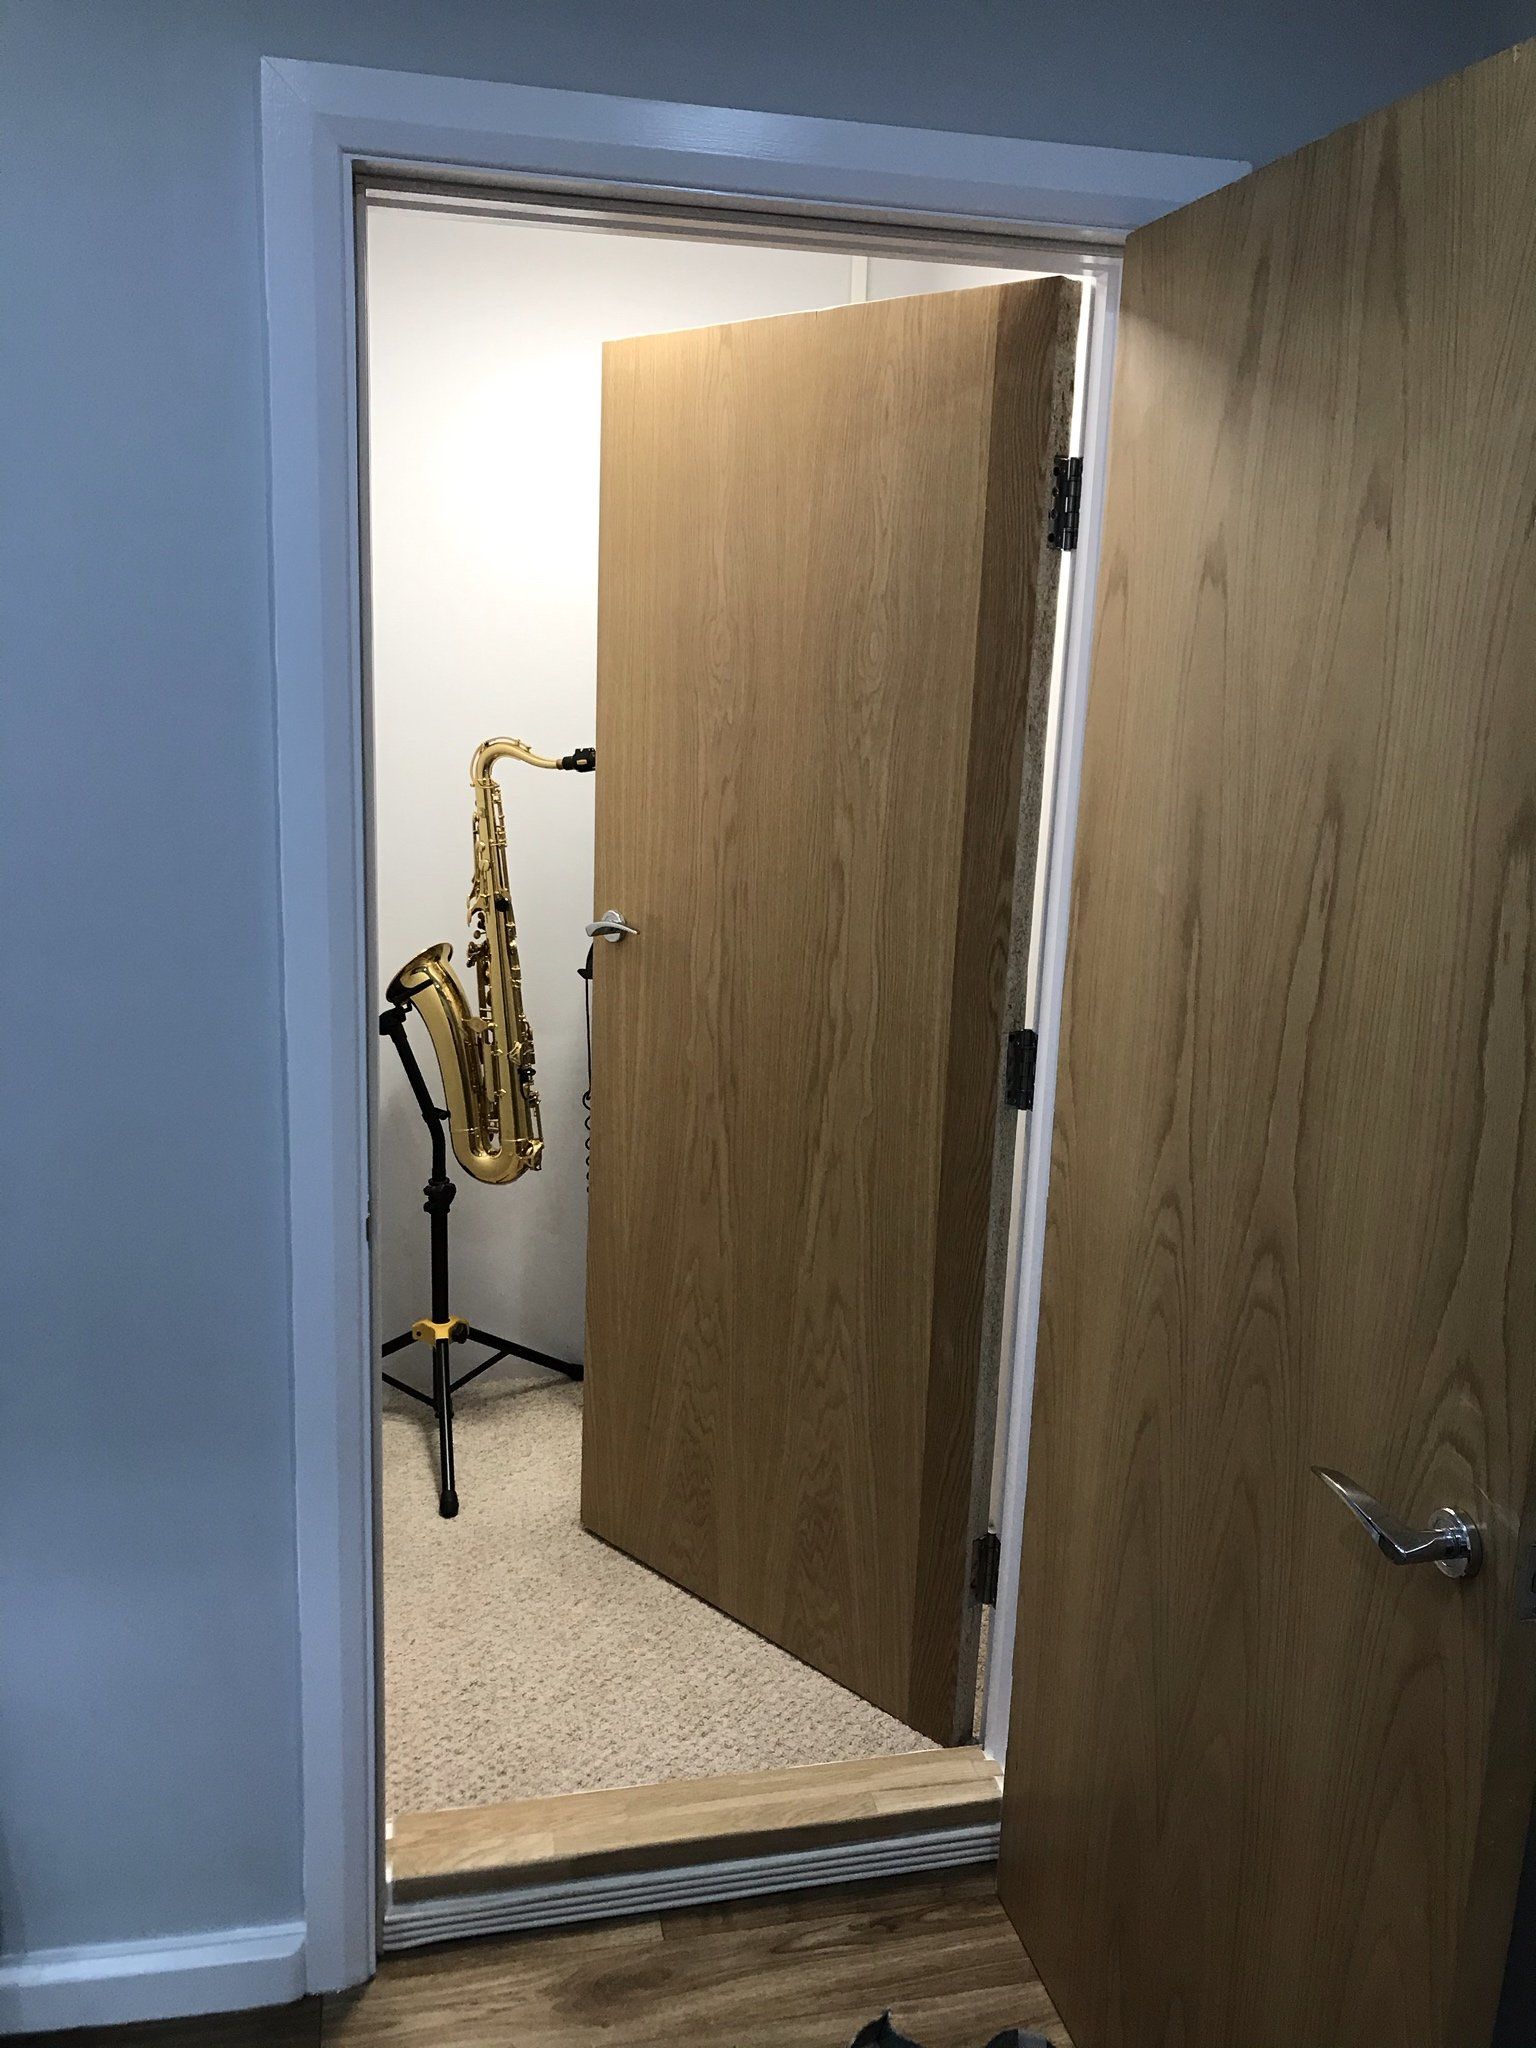
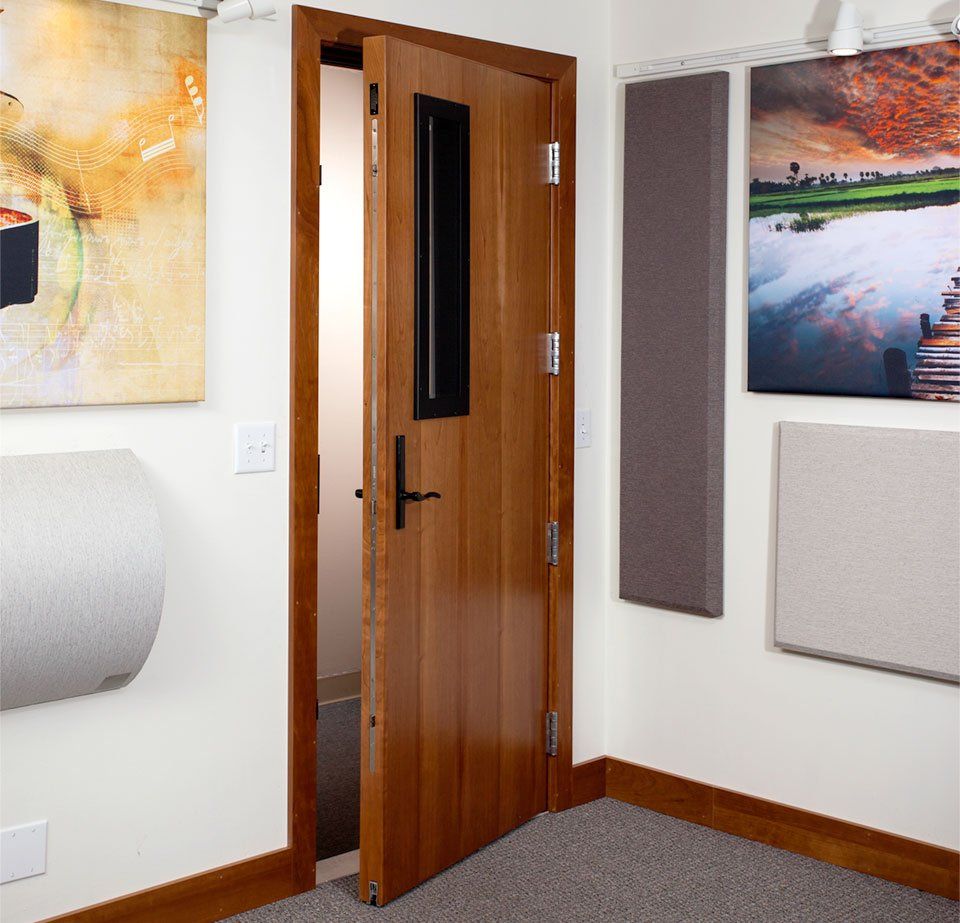
Of course we all need at least one door as an entrance. The heavier and more dense the door, the more mass it will have and the more sound it will block. So upgrading doors to heavy, solid core fire doors is a good idea. Like with windows, we would also recommend to double up your doors, one door on the external wall, one door on the internal soundproof wall.
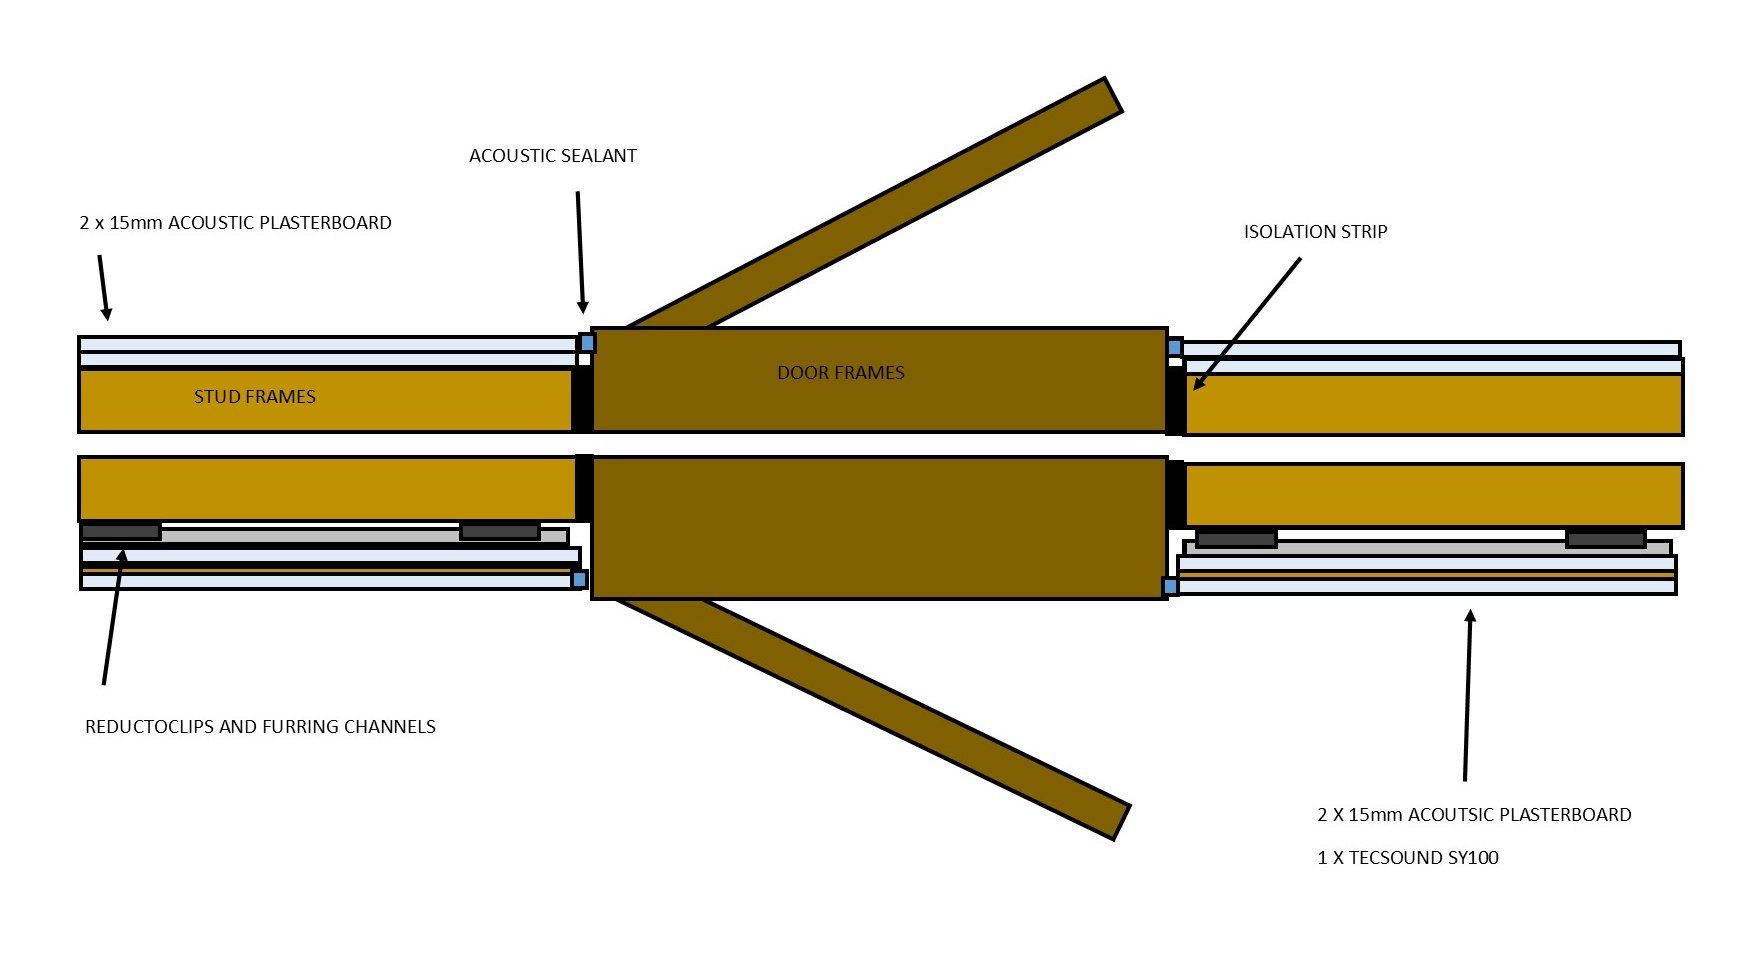
Double stud wall (control room divider) example below
Check out the blog below for more ideas on how to upgrade doors
Garage Doors
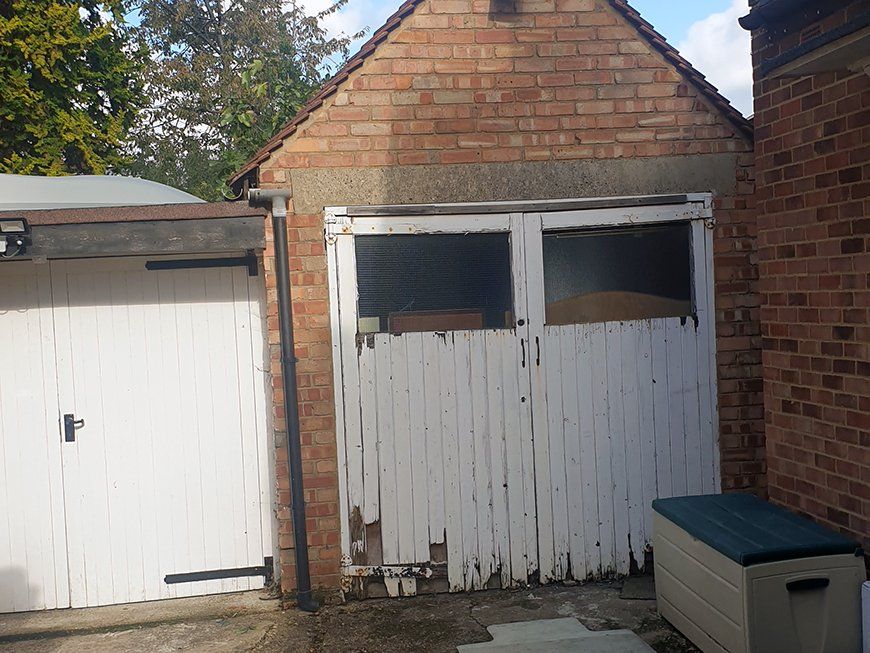
A garage door is going to be a huge weak point. The best option is to rip it out and block the whole up with high density concrete block.
If you need to keep the look of your garage the same on the outside, then either block up the door way internally and fix your garage door onto the outside of the wall.
A second option is leave the existing door in place and build a new double stud wall inside the garage. The first stud wall should be insulated with acoustic mineral wool and then covered with two layers of acoustic grade plasterboard. Then build another stud frame (with a 10mm air gap from the first frame), in front with the ReductoClip system (same as the other solid walls). This option will also provide a small storage area at the front.
Ventilation in a Music Studio
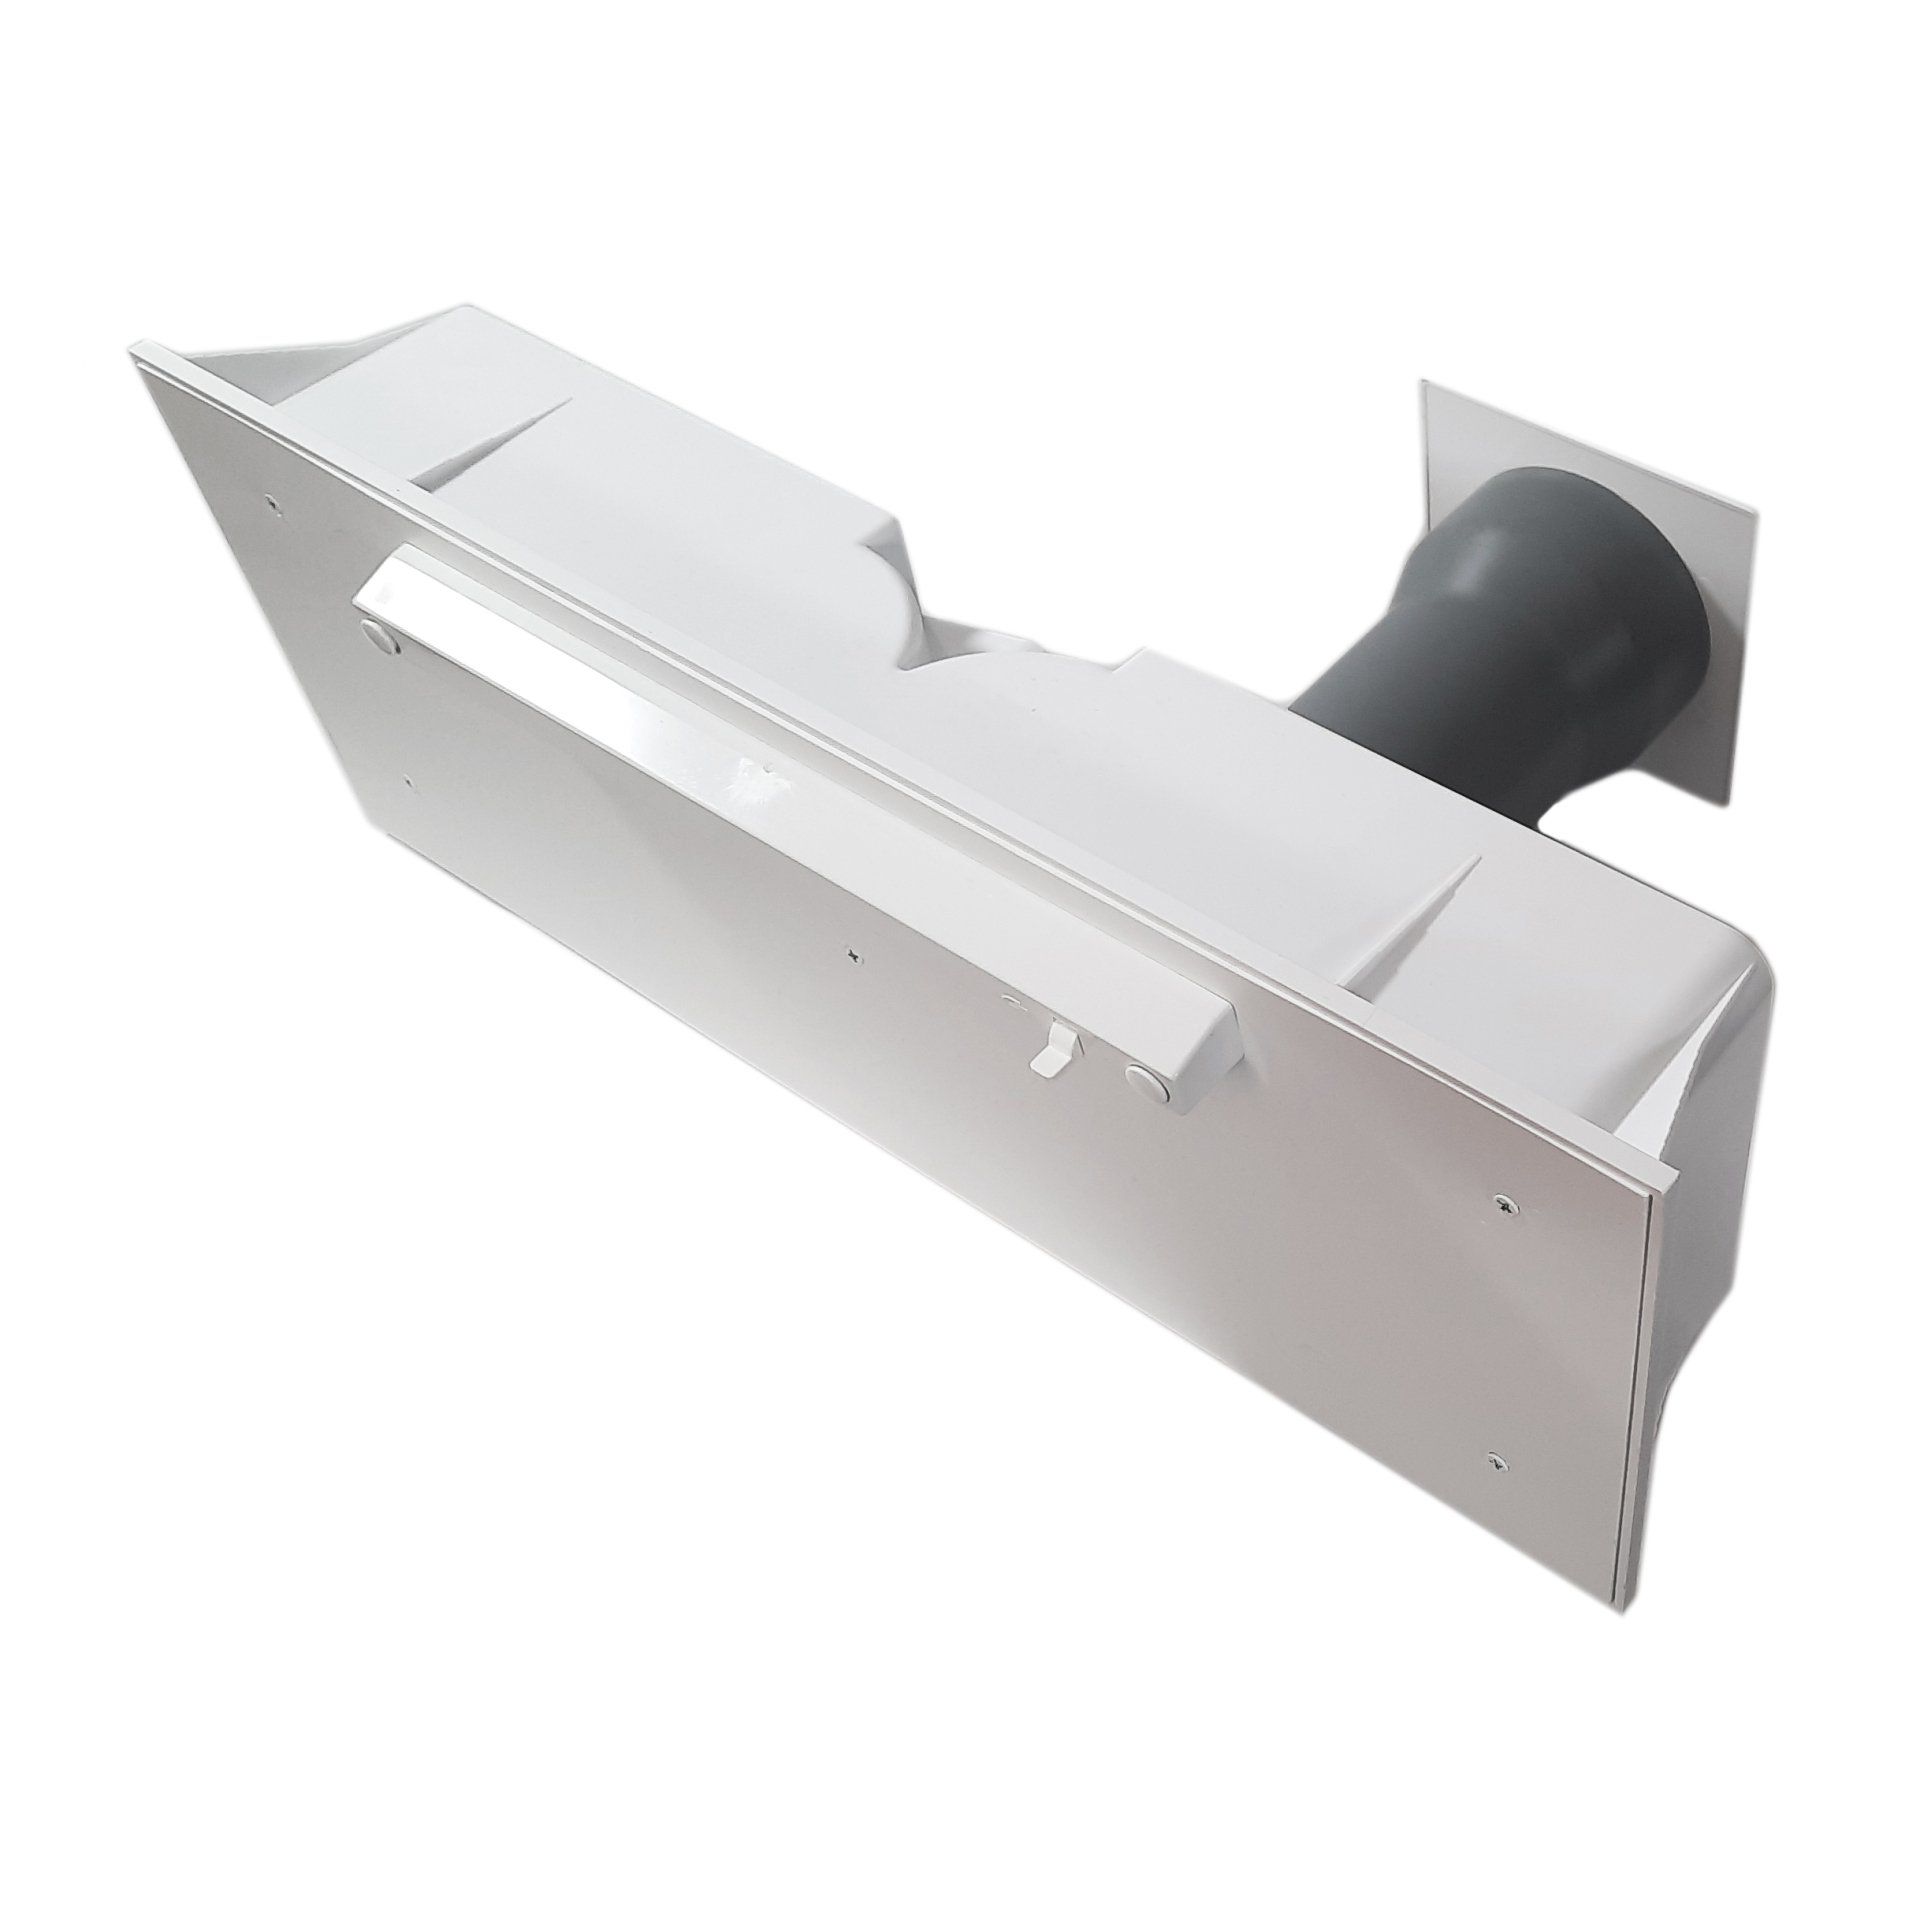
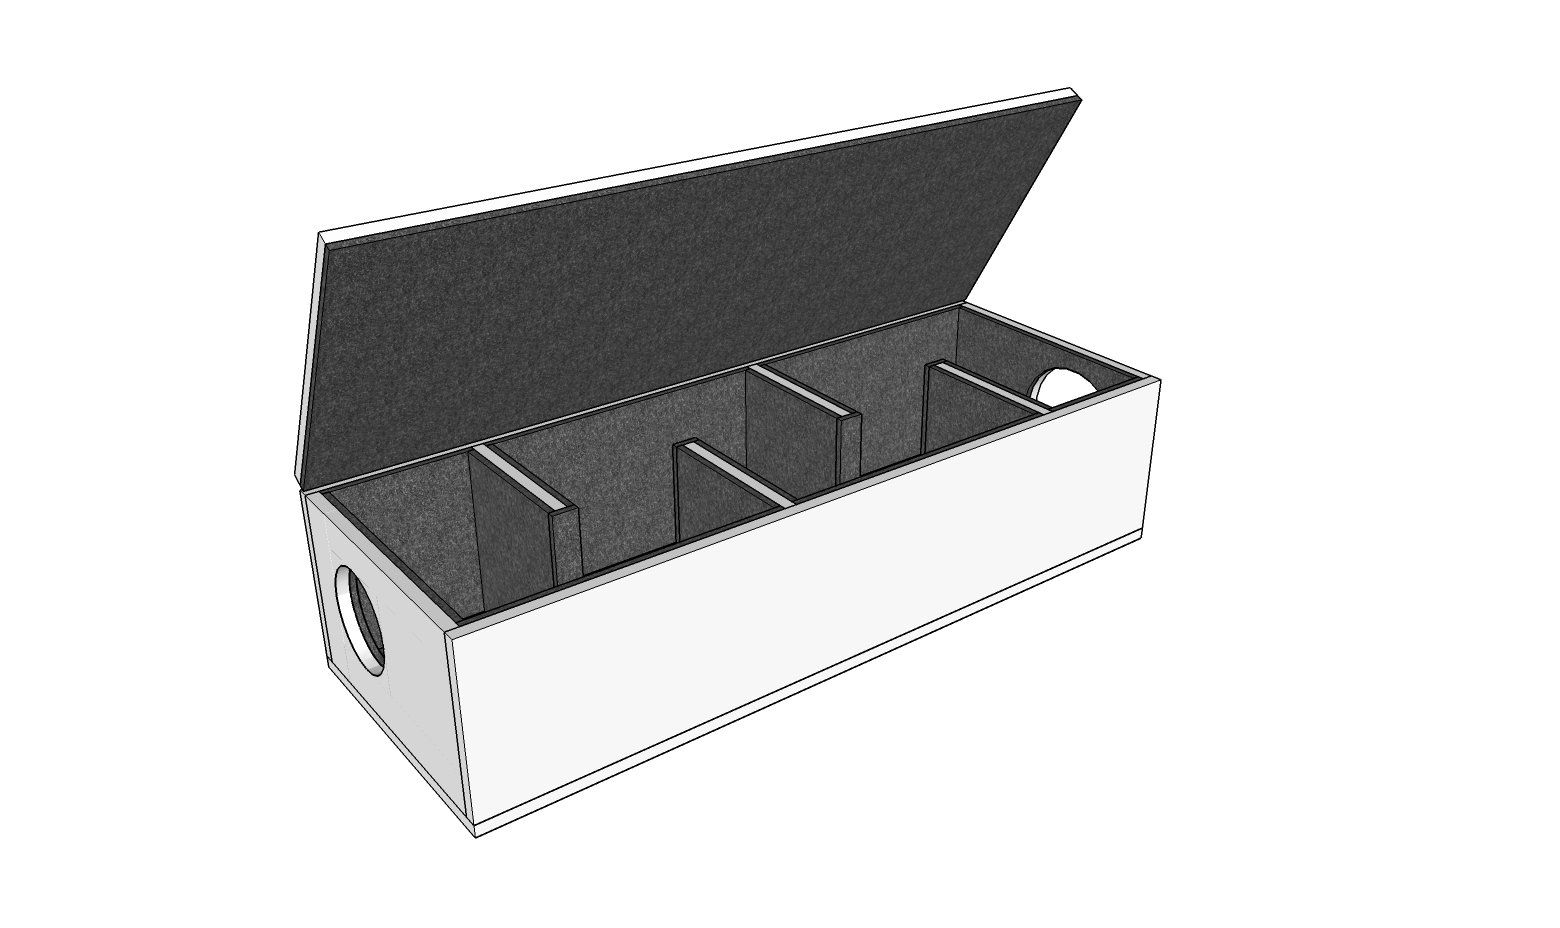
A well soundproofed room will be very well insulated and airtight. This will make the room warm and with no natural air flow. Therefore, we need some sort of ventilation system.
This will always be a weakness to a degree as this is basically a hole from the inside to outside but is unfortunately a necessary step.
You can use expensive, digital air conditioning systems and powered ventilation systems if you want, or just a basic in/out
passive acoustic vent. But you will need to insulate any ducting and reduce as much sound from the outlet as you can by using baffles / silencers / attenuators.
For more technical info have a read through our studio soundproofing blog here
Acoustic Treatment (Sound Absorption)
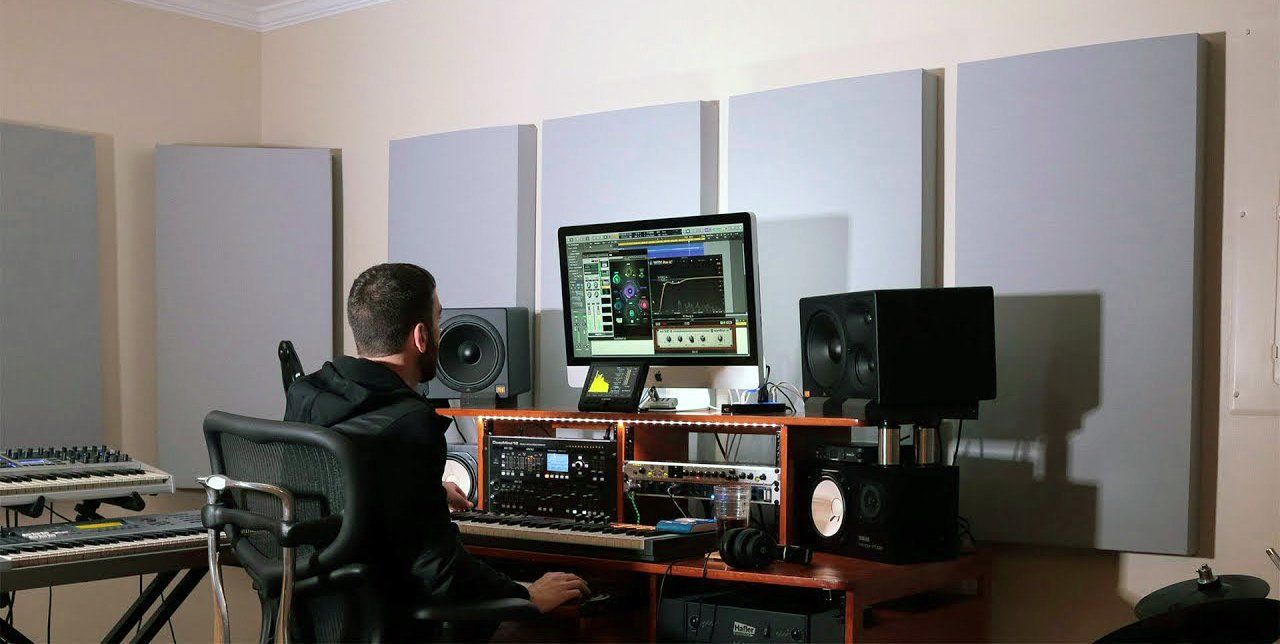
Your newly soundproofed studio will now be covered with plasterboard which is a very reflective material (acoustcially). Generally for practice rooms and studios we don't want the room to have a lot of echo, so the room will now need to be acoustically treated.
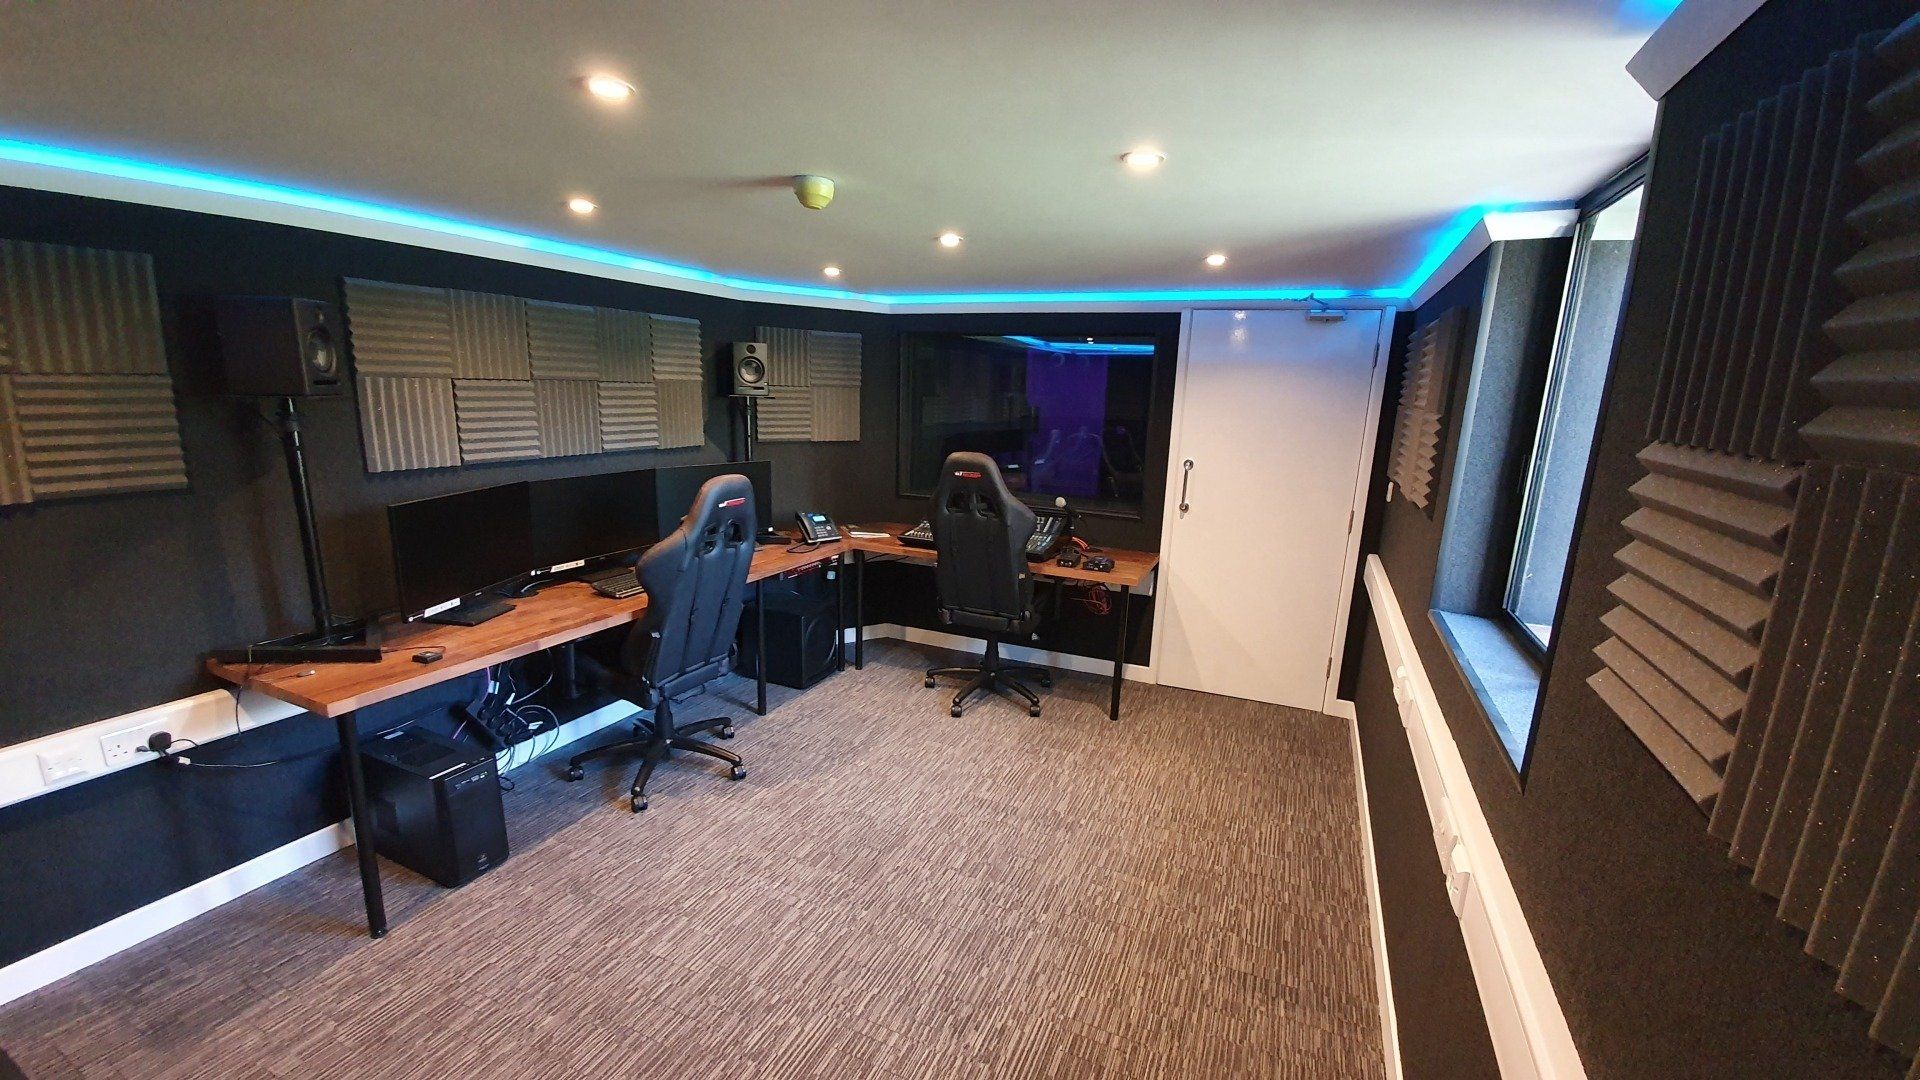
We have a range of professional Class A sound absorption panels available in multiple sizes, shapes, and colours. These can be fixed to the walls or suspended from the ceiling .
We can advise you on what you need, how many you need and best placement of the panels
For more info about Acoustic Treatment / Sound Absorption
How Much Does Studio Soundproofing Cost?
Cost is determined by many different factors including the construction of the existing building / space, the size of the space, the level of soundproofing required, how many windows and doors etc. So the best thing to do is get in touch with as much info as possible and we can work out an initial idea of cost for you.
As a rough starting point, an average one room studio conversion of around 4m x 4m in size (16m2) would work out at around
£3,000 to £5,000 for the soundproofing materials. This doesn't include installation costs or new windows / doors.
How To Get A Quote
From here, you have a good idea of what is involved to soundproof your studio / practice room. The best way forward from this point is to get in touch with our studio team, so that we can put together the best specification for you and work out an initial idea of material cost.
We will need the following info:
Dimensions Of The Room
If the room is a simple square / rectangle shape then just the width, length and height. If the room is a more asymmetrical shape, then send us a floor plan with your perimeter dimensions.
Info About The Structure
We will need to know the construction of each wall i.e are all the walls brick or do you have any internal stud walls? Are they single brick, concrete block, double skin etc? What is the floor? What is the ceiling etc?
Photos
If you can provide photos of the inside and outside of the space, this will help us to see the exact layout and construction.
What Will You Use The Room For?
Rehearsals or recording? Just vocals, acoustic instruments, drums, full bands etc?
We don’t expect you to become an overnight soundproofing expert, that’s what we’re here for.
Book a FREE 45 mins Soundproofing Studio Consultation
Attend your phone appointment at a time to suit you with one of our Studio experts
How To Soundproof A Music Studio / Practice Room (Timber Building)
Just to explain first of all, a timber structure is not the most ideal place to start.
Sound is predominantly blocked by mass. By starting with a light weight construction (compared to concrete block for example), you are starting at a much weaker point. This means if you use the same system as a solid building studio, your results will not be as good as in the solid building. If you wish to achieve the same kind of results, you need to go much further.
This certainly doesn't mean you can't soundproof a timber structure to a good level, but your results will be limited compared to a solid structure.
What Kind Of Results Can You Expect?
Results vary in every situation because every structure and every situation is different. But to give a rough expectation, If you add our standard studio system to a thin timber shell (Like a shed, barn etc) you will achieve around a 45 - 50dB level.
If you have an insulated garden room with a thick, high mass external cladding, or if you are able to upgrade the timber structure first (as detailed below), you can achieve up to around 65dB.
Bare in mind that because of the lack of mass, timber structures will struggle more with lower frequencies like bass and sub bass. So even with an overall high dB reduction, the lower frequencies will not be reduced as much.
What does this mean?
A room reducing 45 - 50dB will block out most sound up to around 80dB. So this will do a good job against things like vocals and acoustic instruments. Louder instruments such as drums and amplified instruments will still be heard outside at a reduced volume.
A room reducing 60 - 65dB will block out most sounds up to around 95dB. This means louder instruments such as drums and amplified instruments should be greatly reduced. It will still be audible directly outside but at a low muffled volume.
The Key Steps to Soundproofing a Studio
- Remove Existing Plasterboard Or Internal Cladding - To expose the frame behind.
- Insulate Existing Frame - If not already insulated you need to install a good thermal or acoustic insulation into the frame
- Build A "Room Within A Room" - Build a new set of stud frames a minimum of 10mm in front of existing structure to create a decoupled "inner" room that can contain the sound energy internally.
- Add Mass - Airborne sound is blocked by mass. The heavier and more dense the surfaces of your inner room are, the more sound it will block.
- Add Resilience - The rooms ability to absorb sound energy and vibration. The surfaces need to be able to flex rather than being rigid.
- Make The Room Air Tight - Any gaps for air to leak through, sound will leak through.
- Upgrade Windows And Doors - These are the biggest weak points of the room with far less mass than the surfaces. Upgrade and Double Up!
When a high volume of sound is projected, it creates an Airborne sound wave, but also a strong vibration energy. The airborne sound will spread out 360 degrees so lining all surfaces with heavy, dense materials will make it harder for the soundwave to escape.
Just as importantly, you need to absorb the energy and vibration of the sound. If the vibration gets into the structure of the building it will spread very easily. Therefore, we need to build new soundproof, resilient walls in front of every existing wall, a suspended ceiling below the existing ceiling, and a floating floor above the subfloor. This creates a soundproof box internally, that can contain the sound and vibration and stop it getting into the structure. These surfaces need to be able to flex to absorb the sound in the same way a cars' suspension springs help it absorb the impact of potholes.
Soundproofing Walls and Ceilings
To create the internal walls and ceiling, we use our ReductoClip system. This system is designed to add a lot of extra mass to the walls and ceiling but that mass is fixed in a resilient way, allowing it to absorb huge amounts of vibration, including the strong vibration of lower bass frequencies.
Unlike traditional resilient bar soundproofing systems, our ReductoClip system offers the slimmest independent wall solution and the highest level of soundproofing
1. ReductoClips - decouple the mass layers from the timber joists and act like a shock absorbing suspension system to dampen high levels of sound energy and vibration
2. ReductoClip Furring Channels - extra wide to make fixing acoustic plasterboards quicker and easier
3. Acoustic Mineral Wool - dampens sound within the cavity to stop sound amplifying
4. Acoustic Plasterboard - (2 layers) to increase the mass of the ceiling. More mass and density than standard plasterboard but with the same finishing and decorating techniques
5. FlexiSound 5 - viscoelastic membrane to add further mass to the ceiling. A different type of mass to reduce different sound frequencies to the other layers. FlexiSound also helps to dampen sound energy and vibration
1. Independent Stud Frame - 10mm air gap isolates the soundproofing from the offending wall for best possible sound reduction performance
2. Isolation Strip - isolates from surrounding surfaces to reduce flanking vibration
3. ReductoClips - decouple the mass layers from the frame and acts like a shock absorbing suspension system to dampen high levels of sound energy and vibration
4. ReductoClip Furring Channels - extra wide to make fixing acoustic plasterboards quicker and easier
5. Acoustic Mineral Wool - dampens sound within the frame cavity to stop sound amplifying
6. Acoustic Plasterboard - (2 layers) to increase the mass of the wall. More mass and density than standard plasterboard but with the same finishing and decorating techniques
7. FlexiSound 5 - viscoelastic membrane to add further mass to the wall. A different type of mass to reduce different sound frequencies to the other layers. FlexiSound also helps to dampen sound energy and vibration
Soundproofing the Floor of a Music Studio
On a concrete floor you already have a great deal of mass already there. All we really need to do is absorb the vibration and energy of the sound. To minimize height build up, we have some very thin solutions to create a "floating" floor, separating your floor finish
(carpet / laminate etc) from the concrete and absorbing the vibration in between.
If you have plenty of height to play with, you can further upgrade the floor by creating a secondary floor using isolated timber battens, insulation and then a combination of high mass floorboards and a resilient layer.
ImpactoMat 5mm or SoundMat 2 Plus direct to concrete with floor finish directly on top
Floating floor using timber batons isolated with Isolation Strip above and below, 60kg mineral wool between batons, SoundScreed 25mm direct to batons and SoundMat 2 Plus above.
If your studio is not on the ground floor or is a timber joist construction instead of concrete, you will have to go a lot further. Get in touch for advice.
Soundproofing Doors and Windows
Windows and Glass Doors
Windows and doors will always be the weak link as they have far less mass than the walls. In a perfect world we would have just one single width door and no windows at all, to get best results. However, we appreciate that a lot of people like to have some natural light in the room.
Our advice is either remove windows and large doors and brick them up, or double them up. Because you are building a new soundproof wall on the inside you can have one window on the external wall and another window (secondary glazing) on the inside. This will still be weaker than the rest of the wall, but it will be a minimal weak point now and you can keep your natural light.
Single Entrance Doors
Of course we all need at least one door as an entrance. The heavier and more dense the door, the more mass it will have and the more sound it will block. So upgrading doors to heavy, solid core fire doors is a good idea. Like with windows, we would also recommend to double up your doors, one door on the external wall, one door on the internal soundproof wall.
Double stud wall (control room divider) example below
Check out the blog below for more ideas on how to upgrade doors
Ventilation when Soundproofing a Music Studio
A well soundproofed room will be very well insulated and airtight. This will make the room warm and with no natural air flow. Therefore, we need some sort of ventilation system.
This will always be a weakness to a degree as this is basically a hole from the inside to outside but is unfortunately a necessary step.
You can use expensive, digital air conditioning systems and powered ventilation systems if you want, or just a basic in/out
passive acoustic vent. But you will need to insulate any ducting and reduce as much sound from the outlet as you can by using baffles / silencers / attenuators.
For more technical info have a read through our studio soundproofing blog here
Acoustic Treatment (Sound Absorption)
Your newly soundproofed studio will now be covered with plasterboard which is a very reflective material (acoustcially). Generally for practice rooms and studios we don't want the room to have a lot of echo, so the room will now need to be acoustically treated.
We have a range of professional Class A sound absorption panels available in multiple sizes, shapes, and colours. These can be fixed to the walls or suspended from the ceiling .
We can advise you on what you need, how many you need and best placement of the panels
For more info about Acoustic Treatment / Sound Absorption
How Much Does Studio Soundproofing Cost?
Cost is determined by many different factors including the construction of the existing building / space, the size of the space, the level of soundproofing required, how many windows and doors etc. So the best thing to do is get in touch with as much info as possible and we can work out an initial idea of cost for you.
As a rough starting point, an average one room studio conversion of around 4m x 4m in size (16m2) would work out at around
£3,000 to £5,000 for the soundproofing materials. This doesn't include installation costs or new windows / doors.
How To Get A Quote
From here, you have a good idea of what is involved to soundproof your studio / practice room. The best way forward from this point is to get in touch with our studio team, so that we can put together the best specification for you and work out an initial idea of material cost.
We will need the following info:
Dimensions Of The Room
If the room is a simple square / rectangle shape then just the width, length and height. If the room is a more asymmetrical shape, then send us a floor plan with your perimeter dimensions.
Info About The Structure
We will need to know the construction of each wall i.e are all the walls external timber walls or do you have any solid walls or internal stud walls? Are the walls bare frames and cladding or are they already insulated and boarded? What is the floor? What is the ceiling etc?
Photos
If you can provide photos of the inside and outside of the space, this will help us to see the exact layout and construction.
What Will You Use The Room For?
Rehearsals or recording? Just vocals, acoustic instruments, drums, full bands etc?
We don’t expect you to become an overnight expert in soundproofing, that’s what we’re here for.
Book a FREE 45 mins Soundproofing Studio Consultation
Attend your phone appointment at a time to suit you with one of our Studio experts


